
Real Shopify costs in South Africa for 2026: plans in rand, gateway fees, apps, VAT, and worked examples by turnover band. From Honey Whale.


How To Integrate Zapper As A Payment Provider With Your Shopify Store
Published
Nov 24, 2021
Find out useful information that will Describe how to Install and Configure Zapper as a Payment Provider for the Shopify eCommerce platform.
What is Zapper?
Zapper for your e-commerce site means that new customers only need to scan a QR Code with Zapper and they’re instantly registered or logged-in. And then for payments at checkout, another Zap and they’re done. Quick and convenient for the user. Profitable for you. With Zapper securely passing the registration details from the customer’s profile, all you have to do is extend a warm welcome. No registration forms, no usernames, no passwords, no hassle. Just instant access to your site and more qualified sales opportunities.
Overview
The Zapper payment provider for Shopify facilitates easy payments by providing customers with an interactive dynamic QR code at checkout, allowing them to use the Zapper app to scan and pay for their order. Real time payment updates are pushed to the merchants store.
Pre-requisites
Installation
The Zapper payment provider for Shopify is available via this link: https://www.shopify.com/login?redirect=authorize_gateway%2F1030428
NOTE: After clicking this link, you will be required to log into your Shopify store to install the Zapper payment provider.
.png)
Configuration
Navigating to the Zapper Settings
Once installed, configure the Zapper payment provider as follows:
- Go to Settings > Payments
- Under "Alternative payment methods", click the "Edit" button next to "Zapper is active":
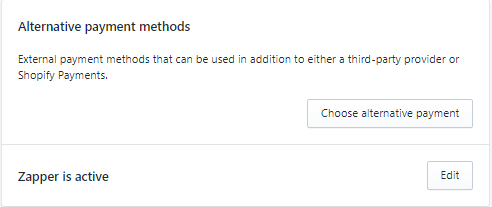
NOTE: If Zapper is not listed as active, it may need to be activated by clicking on "Choose alternative payment" and then selecting Zapper.
Configuring the plugin
Configure the Zapper plugin as follows:
- Enter your Zapper Shopify ID in the format: {merchant_id}-{site_id}, e.g. 1234-5678
- Enter your unique POS Token
- Save updates by clicking the Save or Activate Zapper button.
NOTE: The Merchant ID, Site ID and POS token may be retrieved from the Zapper Merchant Portal
.png)
NOTE: Do not use the ID's in this example. Retrieve your ID's from the Zapper Merchant Portal
Warning: Make sure to leave the Use test mode option unchecked
Checkout and Payments
This section describes the user experience when checking out and making a payment using the Zapper payment method.
Checkout
NOTE: Checkout page may differ slightly based on the Shopify theme.
On Checkout the user will be provided with Zapper as a payment provider option. The following image is a snippet of the payment options on the Shopify checkout page:
.png)
Payments
The payment process is as follows:
- When a user selects the Zapper payment option and proceeds to complete the order, the user will be redirected to the Zapper payment gateway.
- The user will use the mobile app to scan the QR Code on screen and pay.
- On successful payment, the user will see a tick and then be redirected back to the store's default payment confirmation page.
.png)
.png)
NOTE: The order on the merchants store will automatically, be updated with payment complete.
.png)
Insights, Ideas & Inspiration
Boost Your Store's Accessibility with accessiBe: An Overview
In this blog, I delve into the transformative impact of accessiBe, a cutting-edge web accessibility solution designed to enhance Shopify stores. Highlighting its AI-driven technology and adherence to WCAG 2.1 standards, I discuss how accessiBe caters to a wide range of disabilities, including blindness and motor impairments.
Read More
Read More
What Is Paystack And How Can It Benefit My Business In 2023?
Give your customers the gift of modern, frictionless, painless payments. Take a look at Paystack as a payment option today.
Read More
Read More